Step by Step Instructions to make your own Resin Pendants in Minutes!
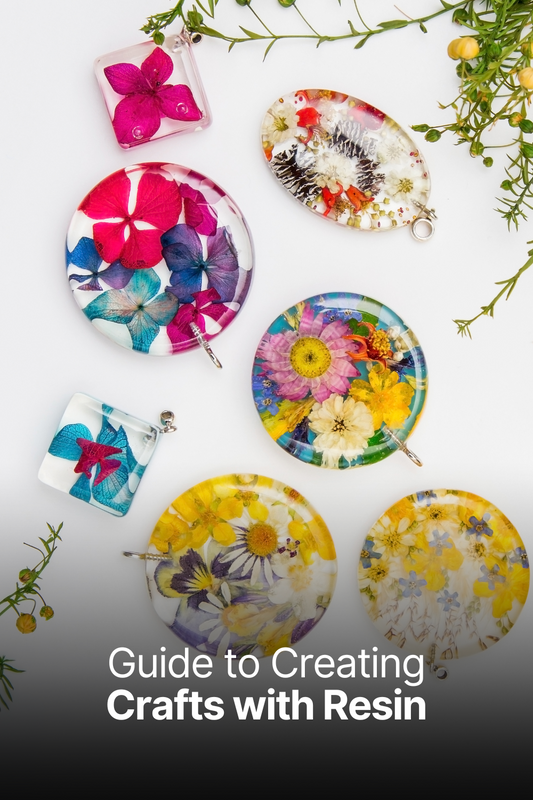
Ever wanted to design your own jewelry? Imagine wearing a pendant that is not only stunning but also handmade by YOU! With the Kitsters DIY Resin Pendant Kit, you can create 10 dazzling pendants with beautiful dried flowers, shimmering mica powders, and crystal-clear resin. Whether you’re looking for a fun weekend craft, a creative date night idea, or a thoughtful gift-making activity, this kit has everything you need to bring your artistic vision to life.
So, roll up your sleeves, grab your kit, and let’s make magic!
A Kit Packed with Creativity
Everything you need is right inside—just open the box and you’re ready to create!
- Messy Mat - Keep your workplace neat and clean.
-
Pressed Flowers – Add a delicate, natural touch to your pendants.
-
UV Resin – The magic ingredient that transforms into solid, glass-like jewelry.
-
UV Lamp – Cures your resin quickly to make it strong and durable.
-
2 Skewers – For mixing, spreading, and creating fun patterns.
-
2 Mica Powders – Add rich, vibrant color to your designs.
-
Resin Tape – Keeps the resin from leaking and helps shape your pieces.
-
10 Metal Pendant Stencils – Different designs to create a variety of pendants.
-
Gloves – Safety first! Protect your hands from sticky resin.
-
10 Connectors – Turn your creations into wearable jewelry
Video Tutorial – A step-by-step guide to ensure success!
Now that you have everything, let’s get started!
Step-by-Step Guide
Step 1: Gloves On, Messy Mat Down – Prep Your Workspace!

Before we begin, let’s make sure everything is ready:
1. Put on your gloves – Resin is fun but can be sticky.
2. Lay down your Messy Mat – No spills, no mess!
3. Gather your materials – You don’t want to be searching for things mid-process.
Pro Tip: Work in a well-ventilated area since resin has a slight smell.
Step 2: Sticky Side Up – Prepping Your Pendant Base!

1. Take your resin tape and place it sticky side up.
2. Pick your favorite pendant stencil and press it firmly onto the tape.
3. This creates a leak-proof base for your resin.
Make sure the stencil is stuck well! If the edges aren’t sealed, the resin might leak.
Step 3: Clear & Chic – Let’s Create a Pressed Flower Pendant!
1. Arrange your pressed flowers inside the pendant frame.
2. Take your UV resin and gently pour a thin layer inside the stencil.
3. Use a skewer to spread the resin evenly so every petal is covered.
Use a small amount! You can always add more later.
Step 4: Time to Cure – Let the UV Lamp Work Its Magic!

1. Plug in your UV lamp and flip open the stand.
2. Turn on the lamp.
3. Place your pendant under the lamp for 1-2 minutes.
4. Check if it’s dry by tapping it with a skewer.
5. If it’s still sticky, cure it for another minute.
Never use your fingers to check—resin is still a chemical!
Step 5: Want That 3D Glossy Look? Let’s Build Layers!
1. Pour another thin layer of resin on top to get that bulky, glassy effect.
2. Spread it evenly and cure again under the UV lamp.
3. Flip the pendant over (without removing the tape) and cure the back.
Your pendant, your rules! You can keep one side flat or make both sides glossy.
Step 6: Color Time – Let’s Add Some Magic!
Want to experiment with colors? Let’s mix some mica powder!
1. Grab a small mixing cup.
2. Pick a mica powder shade (or mix two together for a custom color!).
3. Add just a tiny bit—mica is super pigmented!
4. Pour in some resin and mix until smooth.
5. Pour the colored resin into your stencil and cure it under the UV lamp.
Try a gradient blend, a marbled effect, or mix colors for something truly unique!
Step 7: The Big Reveal – Time to Flaunt Your Pendant!
1. Peel off the resin tape from the back of your pendant.
2. Attach a connector and turn it into a necklace, bracelet, or keychain.
3. And just like that—you’ve made a stunning resin pendant!
Endless Possibilities – What Will You Make?
With this kit, you can create up to 10 unique resin pendants! Here are some ideas:
-
Minimalist Clear Pendants – Elegant and simple.
-
Pressed Flower Pendants – Nature preserved in resin!
-
Shimmering Mica Powder Creations – Vibrant, colorful, and fun.
-
Half-and-Half Designs – Play with clear and colored resin for cool effects.
- Personalized Gifts – Make one-of-a-kind jewelry for loved ones.
How Can You Use This Kit ?
There are so many ways to enjoy your DIY resin kit!
-
DIY Jewelry Making – Create your own signature style.
-
Romantic Date Night – A fun, creative bonding experience.
-
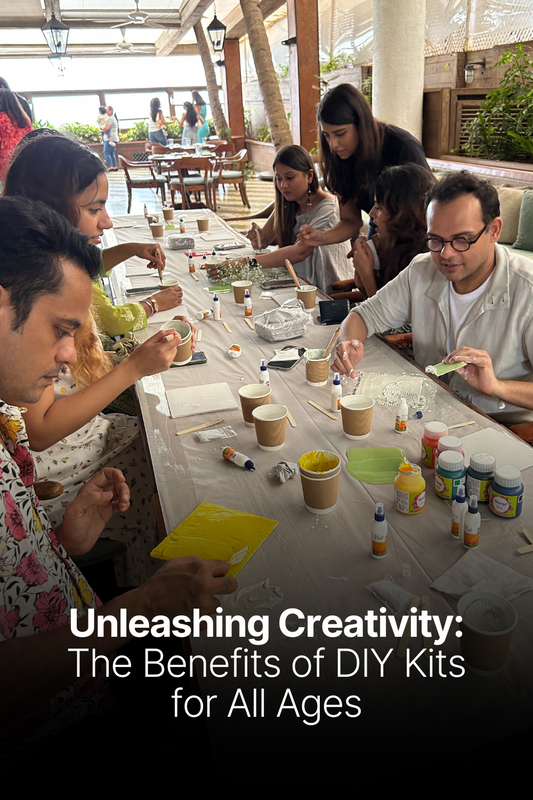
Girls’ Night In – Make memories and matching jewelry with friends!
-
Unique Handmade Gifts – Perfect for birthdays, anniversaries, or just because.
-
Relaxing Hobby – A stress-free, rewarding craft session.
-
Home Craft Business – Who knows? This might just be the start of your jewelry brand!

What will YOU make? Share your creations with #KitstersDIY!
FAQs – Answering Your Burning Questions!
Q: I’m a total beginner. Can I do this?
A: Absolutely! This kit is designed for beginners, and our step-by-step video tutorial (access via QR code) makes it super easy!
Q: How long does the resin take to dry?
A: Just 10-15 minutes under the UV lamp or direct sunlight.
Q: Can I add glitter or other decorations?
A: Of course! Feel free to experiment with glitter, beads, or gold flakes.
Q: Can I make more pendants after using the kit?
A: Yes! You’ll just need more UV resin—everything else is reusable!
Q. Is this safe for kids?
A. Yes! But adult supervision is recommended while handling chemicals.
Ready to Get Crafting?– Now It’s Your Turn!
Did you know that resin art dates back thousands of years? Ancient civilizations used natural tree resin to preserve insects and even create jewelry—a little like what you’re about to do, but with a modern twist! Fast forward to today, and resin art has become a global trend, loved by artists, crafters, and jewelry enthusiasts alike. And guess what? Now, you get to be part of this creative revolution!
Turn liquid into jewelry! Whether you’re making chic minimalist pendants or bold colorful designs, each piece is uniquely yours.
Need more help? Scan the QR code in your kit for a step-by-step video tutorial!
But don’t keep your creativity to yourself—we want to see your masterpieces! Share your creations using #KitstersResinArt and inspire others to craft their own jewelry.
So what are you waiting for? Unleash your creativity, wear your art, and shine!


